Difference between revisions of "Artwork"
(→Photorealistic) |
(→Screenprint) |
||
| Line 30: | Line 30: | ||
[[Image:multi-color.png]] | [[Image:multi-color.png]] | ||
| + | |||
| + | Here is an example of a ''Funhouse'' playfield that has a black keyline, but also showing how it doesn't cover enough to offset the error in the red layer positioning, thus not ''trapping'' the red, most obvious in the top left. Sometimes these printing errors will make it to final production games! | ||
| + | |||
| + | [[Image:funhouse-error.png]] | ||
Screenprinting also allows the use of specialty inks such as '''fluorescent, metallic''' or '''UV-reactive''' inks, which are not possible with four color process printing from digital printers or inkjet. | Screenprinting also allows the use of specialty inks such as '''fluorescent, metallic''' or '''UV-reactive''' inks, which are not possible with four color process printing from digital printers or inkjet. | ||
Revision as of 17:12, 12 January 2015
Contents
Style
When constructing a game at home in a garage, the style of artwork used is not often a priority - the physical creation and development comes first. However, the single most effective draw a game has to bring players in is the backglass, playfield and cabinet artwork.
Screenprint
Until the early 1990's, the only process used in creating playfield art was screenprinting. Even today, most playfields are screenprinted, including Stern, which uses a four-color process method.
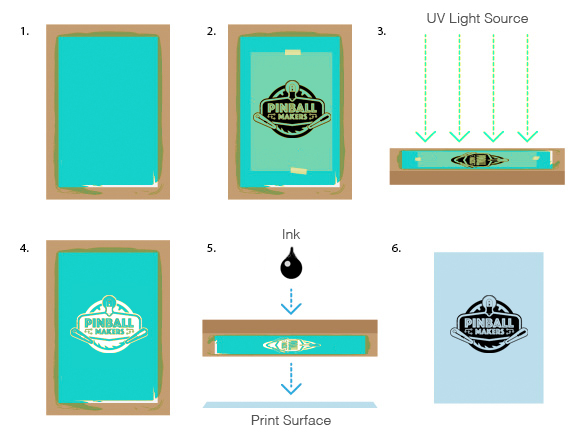
Screenprinting involves pushing ink through a specially-prepared screen unto a surface. This method is ideal for playfields as it can be done on slightly irregular surfaces, or on non-flexible surfaces easily.
The basic process is as follows:
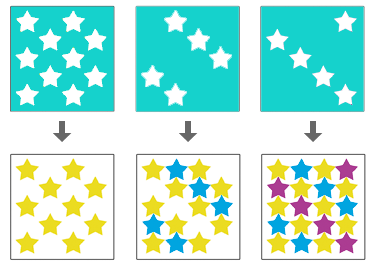
Colors are applied one at a time, generally from lightest color to darkest, with a Black Keyline done last to trap all the colors together in a solid shape with no spaces between them.
Here is an example of a Funhouse playfield that has a black keyline, but also showing how it doesn't cover enough to offset the error in the red layer positioning, thus not trapping the red, most obvious in the top left. Sometimes these printing errors will make it to final production games!
Screenprinting also allows the use of specialty inks such as fluorescent, metallic or UV-reactive inks, which are not possible with four color process printing from digital printers or inkjet.
Below are some playfields with special inks - Attack From Mars using fluorescent green, TRON:LE with silver metallic and Viper: Night Driving with UV-reactive ink under blacklight.
The drawback for screenprinting is that it requires a lot of specialty equipment, materials and semi-toxic inks to do playfield printing, which will likely be beyond the average garage builder.
Photo-realistic
In the 80's, Gottlieb started doing photo-realistic backglass art to differentiate themselves from other manufacturers. This process was done using Offset Printing but today can be done digitally with equipment available to the garage builder, or from specialty print shops such as sign printers.
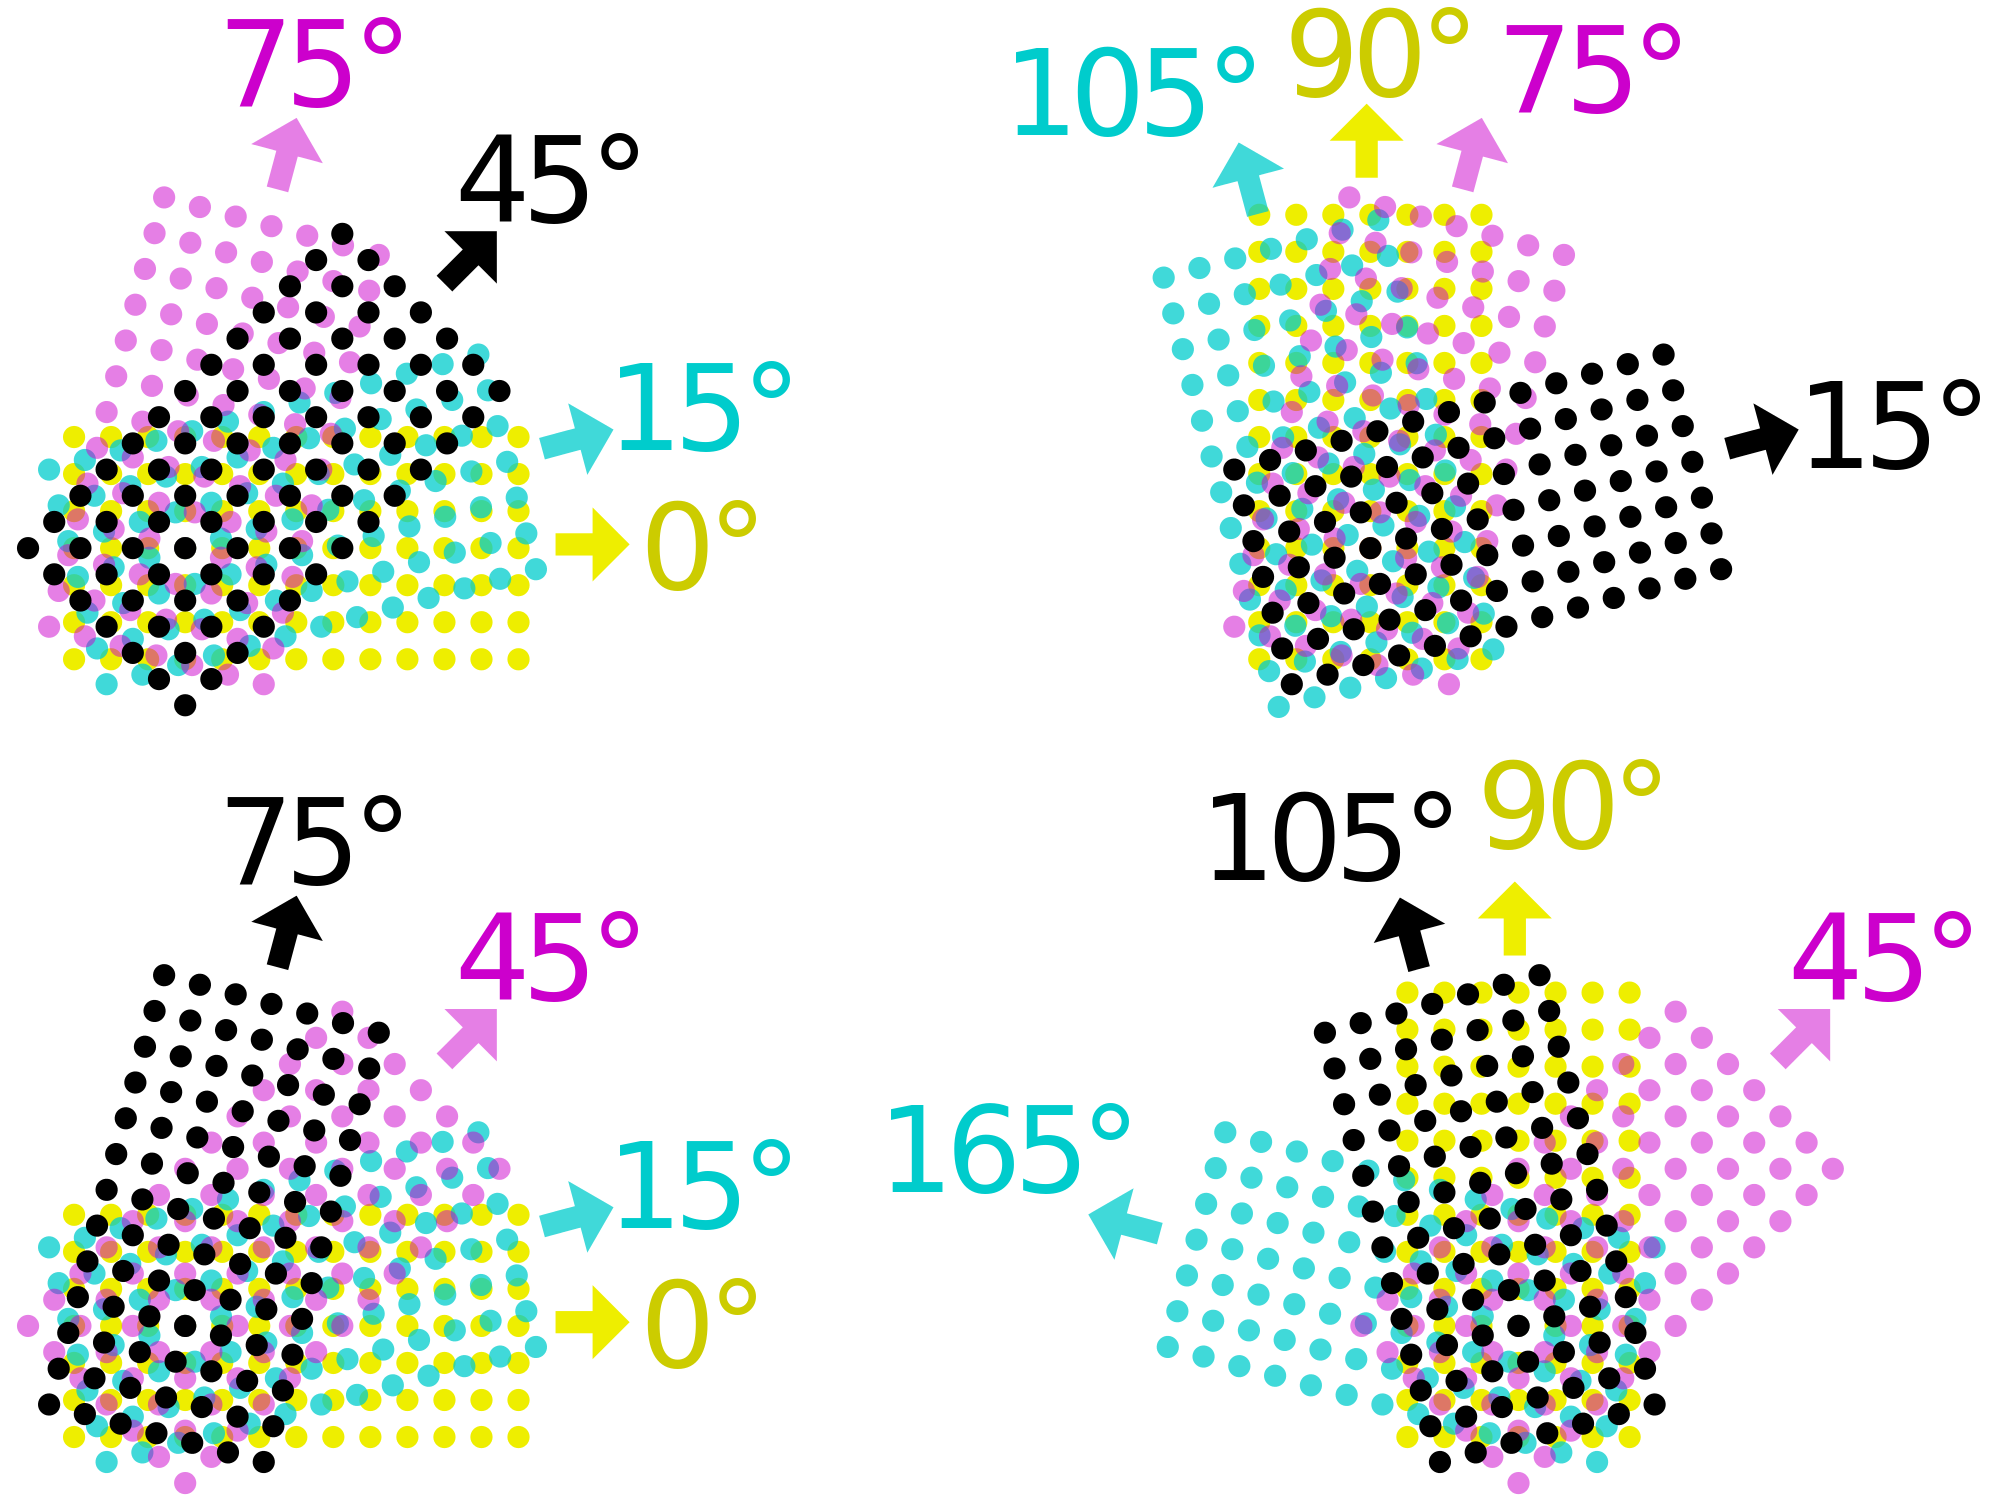
Full color is generated using a Halftone process, using cyan, magenta, yellow and black inks to produce various colors and shades.
These colors are printed at angles from each other to reduce wave patterns, known as Moiré. When the dots are small enough, the human eye can't distinguish them and blends them together, making the image appear solid.
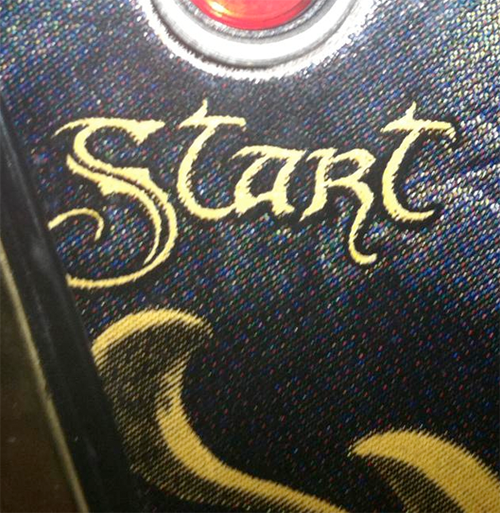
Here is a close-up of a Stern Lord of the Rings showing the four color process dots:
This is how the majority of printing is done today.
The drawback to this process is that the colors can be muted due to the additive effect of the inks to dull colors, and you cannot print any specialty colors without adding additional inks in the process.
However, for the majority of home builders, digital printing provides the best cost / benefit option available.
Printing
All commercial playfields are direct printed using ink. Some users opt to print on vinyl or mylar with adhesive, then overlay it on the playfield. Either the insert locations are trimmed away, or it's printed clear with the insert artwork already included. Printing white on clear media is sometimes a challenge.
Playfield
Graphics are often outlined heavy so they show up.
Backglass
Back in EM and carried over to solid state days, the scores were embedded in with the art. Towards the mid 80's, the numeric scoring was moved down between the speakers, which eventually became alphanumeric, and then DMD. Separating the scoring from the art simplifies things, and ensures the art doesn't need to be compromised by the displays poking through. Usually the name of the game is included somewhere in the artwork, but not always. Titles like Whitewater and Adams family are simply art.
Cabinet
While there have been a few odd cabinet shapes and widths (gottlieb did some funky backboxes, Atari had some super wide-bodies), most custom projects use the standard and widebody from Williams. The backbox of a williams typically has a deeper top and narrow bottom to match the angle of the lower cabinet so it sits flush and flat when folded. Stern has done a similar design for years, but has recently switched to a square backbox with T-molding, as well as a new tilted DMD bezel that is tilted back to minimize reflection on the glass.
Typically the cabinet will have the name of the machine, often as a logo. Sometimes the art is printed with a plain background, sometimes the entire cabinet is filled with art. Like playfields, the cabinet can be direct printing or decaled . Stern has been doing decals for many years now because they can get brighter printing colors that pop compared to direct print.
Graphics
Numeric / Alphanumeric
Numeric and Alphanumeric are sometimes chosen even today because of the ease of programming. Creating dots for DMD animation can take a lot of time.
