Beginner's Guide to STM32 flashing
A Beginner's Guide To Setting Up Cobrapin STM32's
I had a lot of difficulty getting the programming of my STM-32s to work out right. I’m not a Python “super-user” so I put together this guide to help anyone in the same boat as me successfully program your boards.
There are two parts to getting the STM-32’s ready to work with the Cobrapin Board. Both of these processes need Python 2 so you’ll need to install that on your computer. You can have both Python 2 and Python 3 on the same machine but you might want to rename the Python 2 exe file to “Python2” and leave the Python 3 file as just “Python”. In my case I installed Python 2 in the C directory while Python3 resides in the default installation location.
The first step in the process is to use a ST Link programmer to load the firmware for Cobrapin. A copy of the file can be found here OppStm32.2.x.x.x.hex.
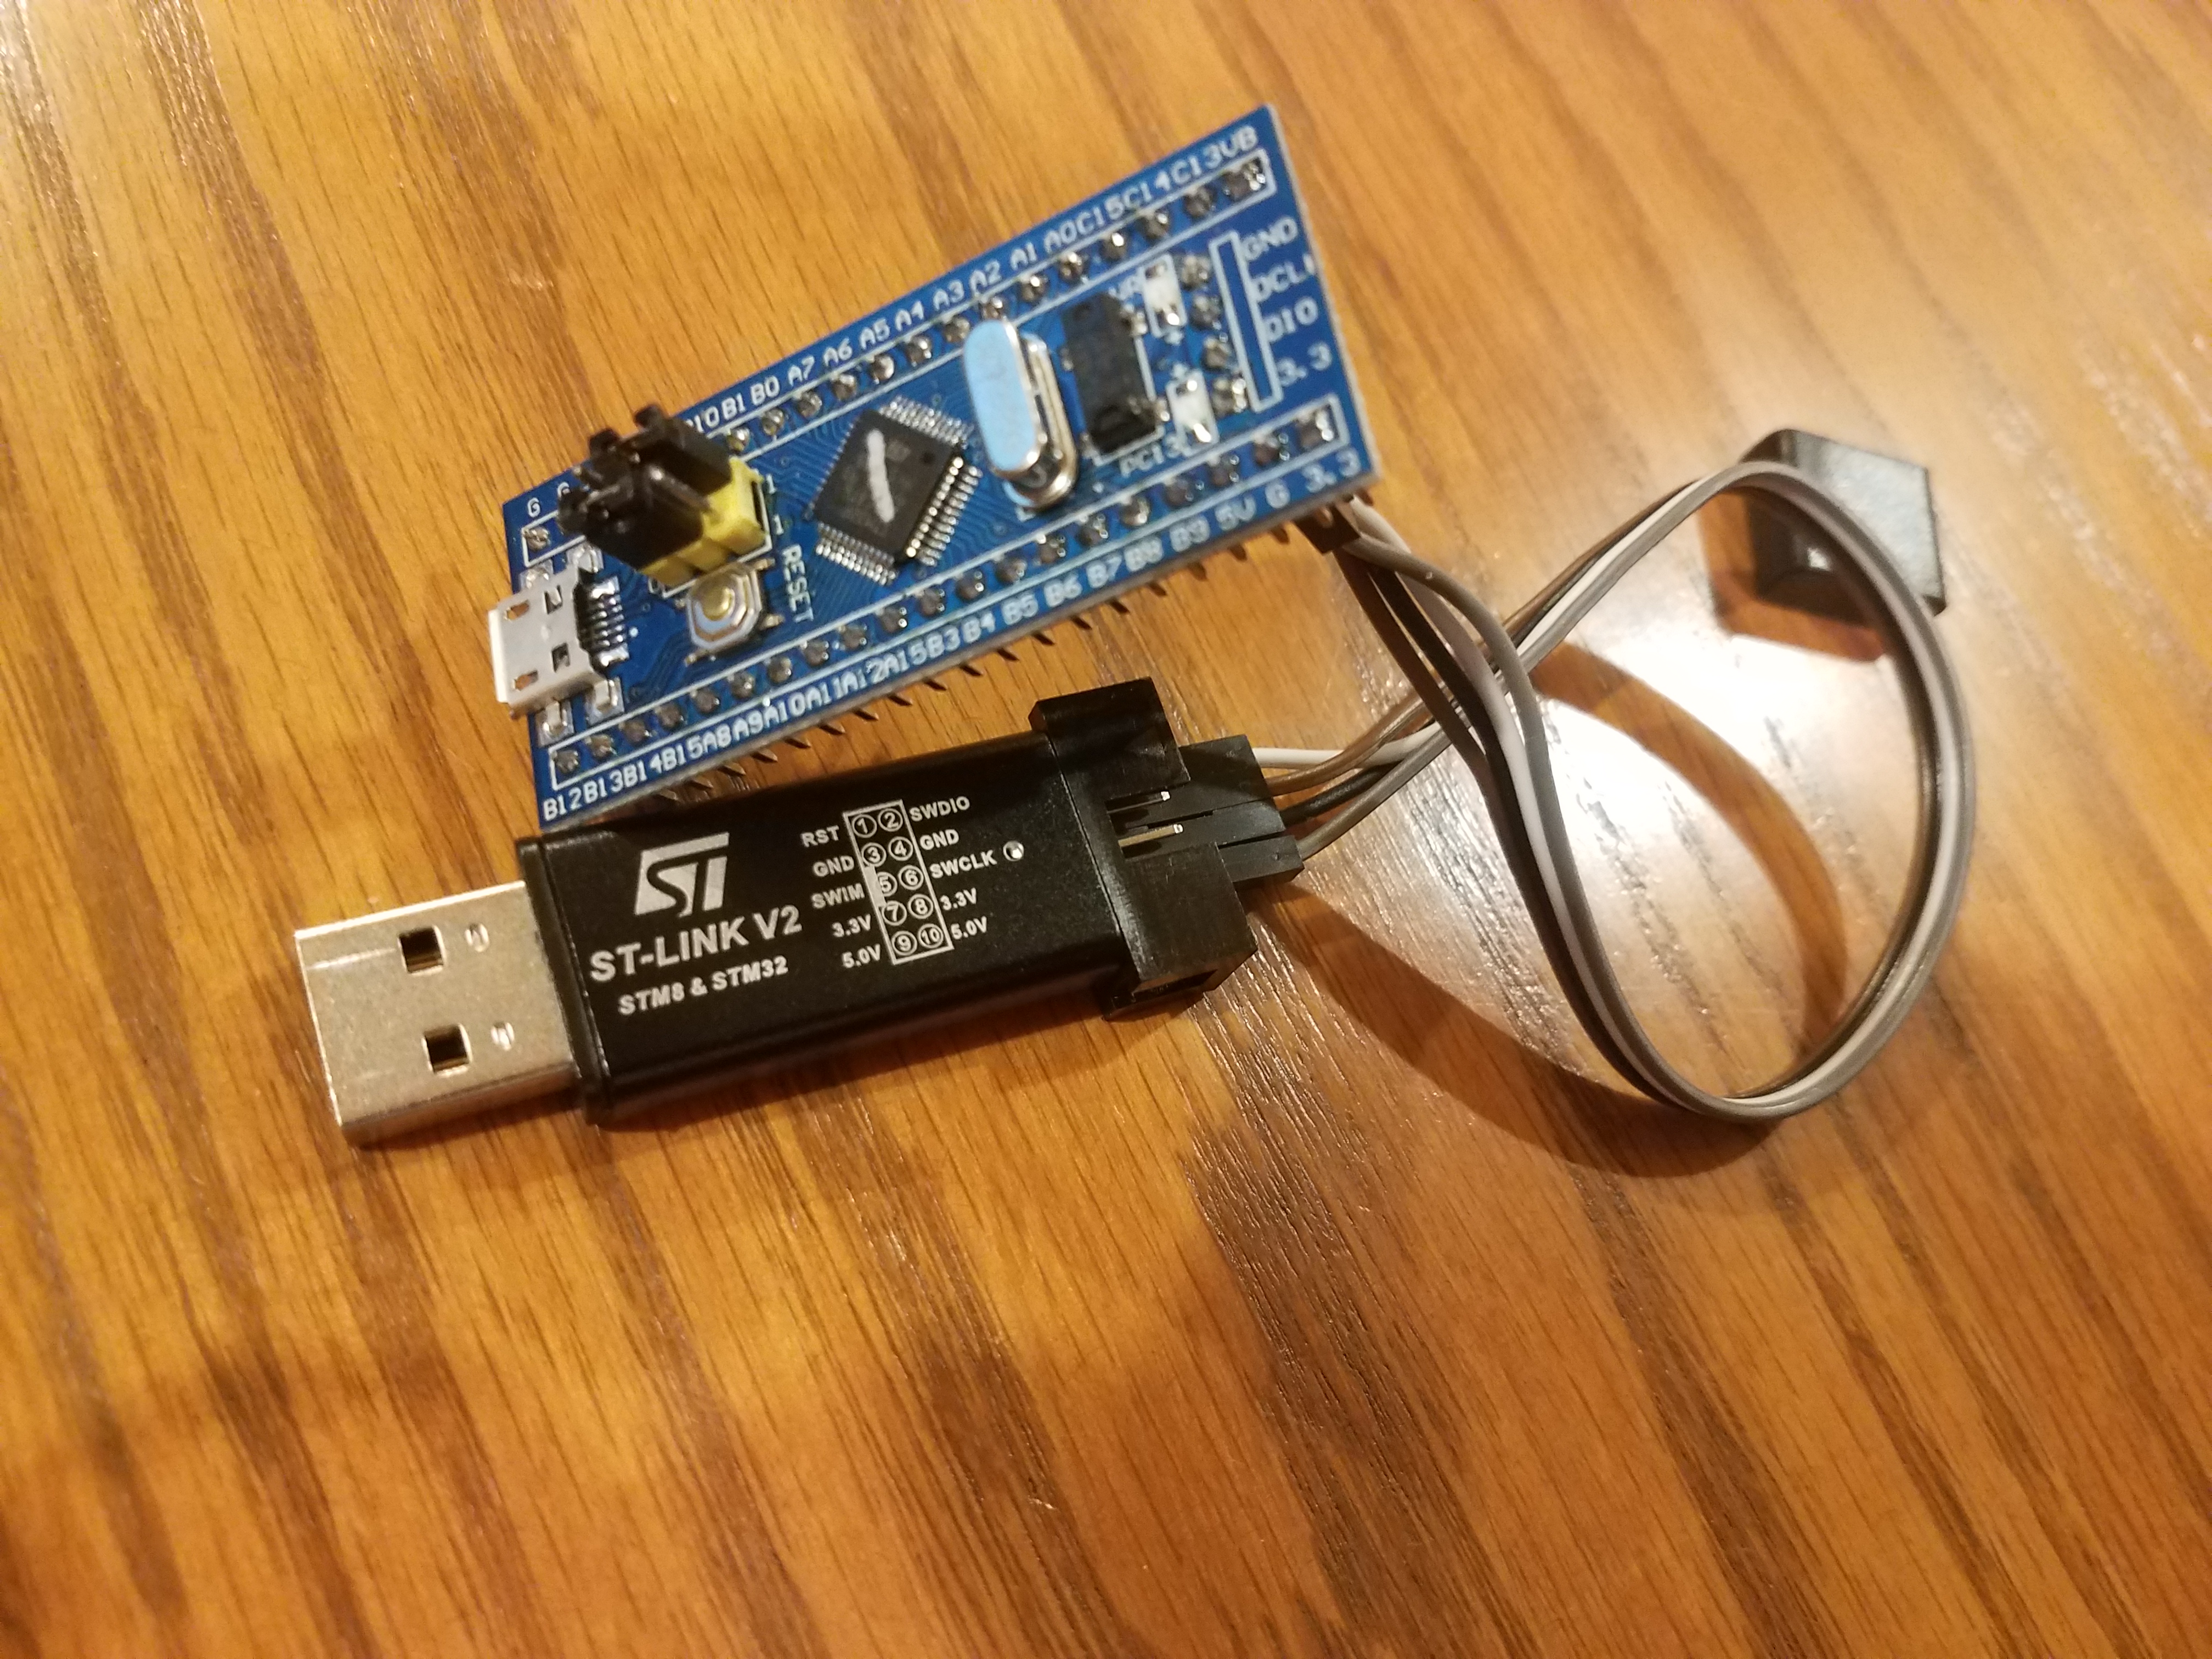
Download the appropriate .hex file to an easy to get to location and plug the pins on the bottom header of the STM-32 to the appropriate wires from the programmer. Also move the top jumper from the “0” to the “1” position as in this photo.
You can download the ST-Link Utility from STMicroelectronics ST-Link Utility and install it on your machine.
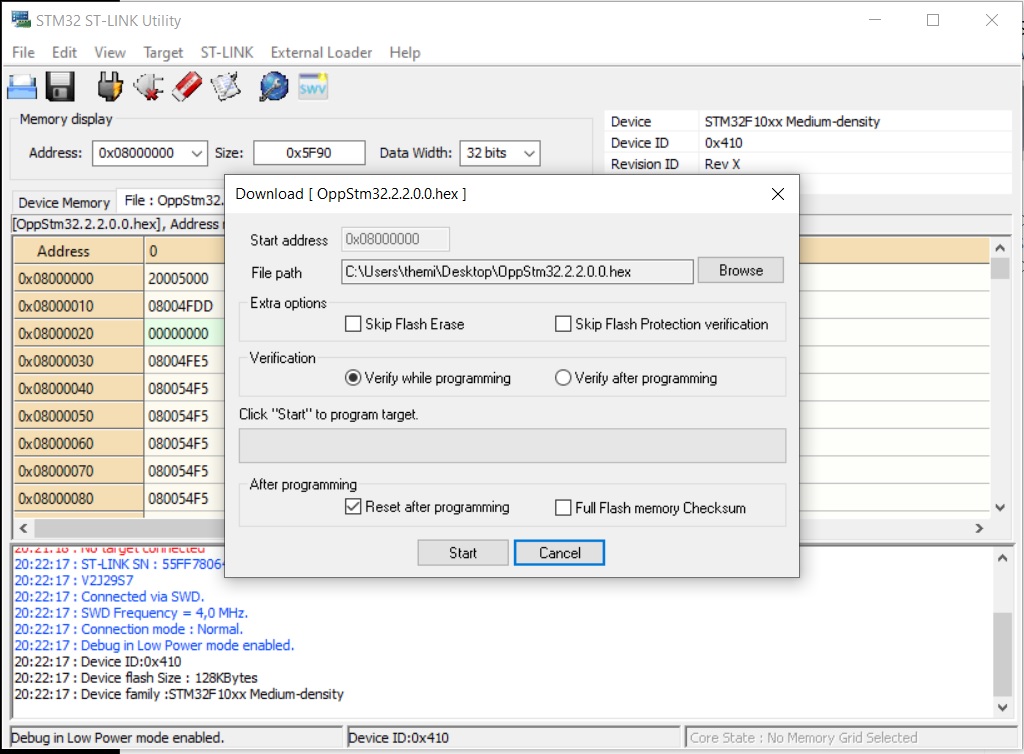
Within the ST Link Utility choose file you downloaded in the previous step and choose “program and verify” in the utility. It should look like this:
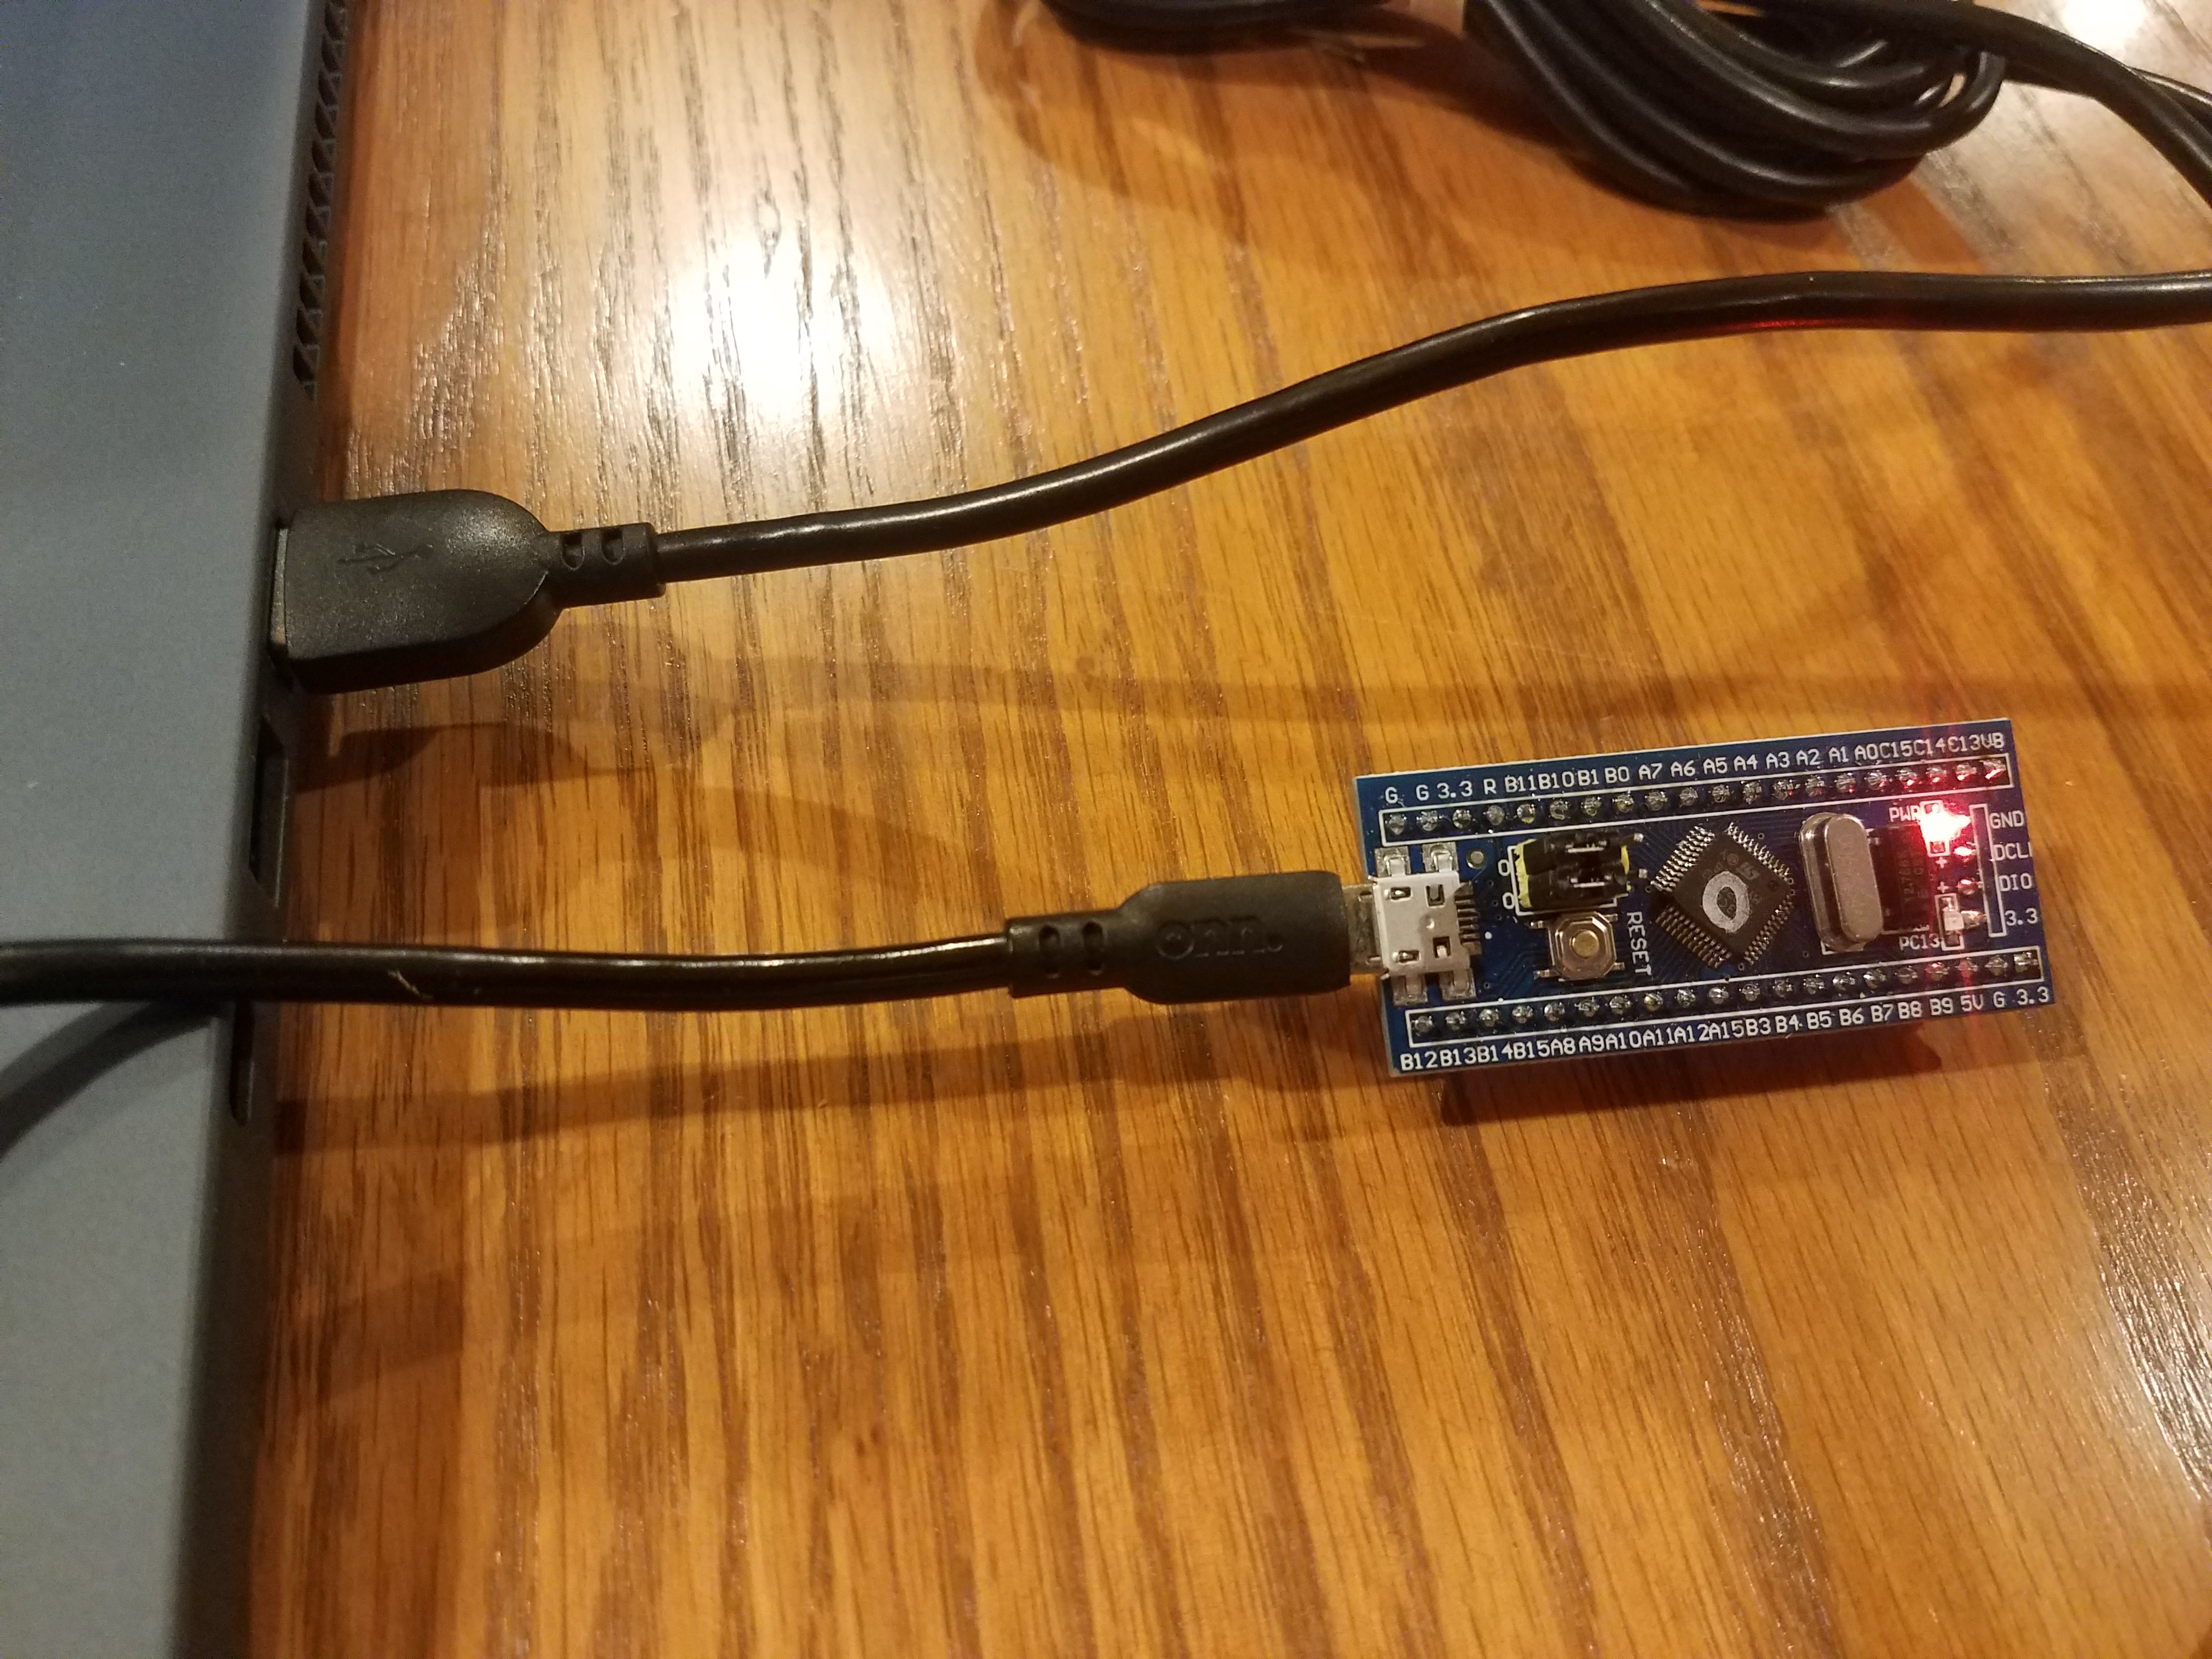
Once the firmware is loaded, unplug the programmer and return the jumper to the “0” position. Next you will need a USB cable to connect your STM-32 to your computer.
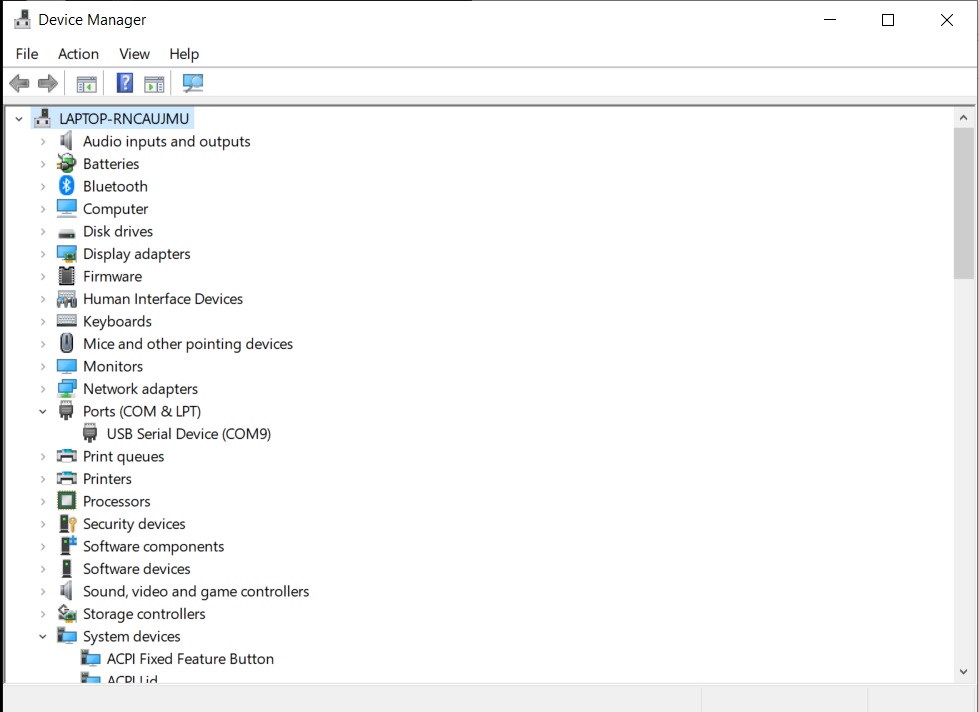
Plug in the USB cable and open “Device Manager”, take note of which port your STM-32 is on like in this screen capture.
You will need to get a copy of Gen2Test from here: Gen2Test Place the file in your python 2 folder.
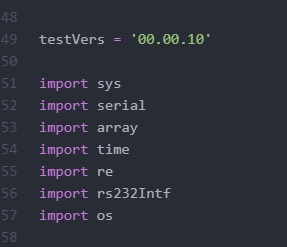
This python program needs some helper programs to make it function and some of these may not already be installed with your version of python 2. Here is a list of the files needed.
In my case I needed to add “serial” and “rs232Intf”. Serial can be added by using pip in command prompt. In command prompt, navigate to your Python 2 folder and if you named your Python 2 exe “python2” then you can enter “python2 -m pip install serial” and it will install serial into your python 2 system (not your Python 3 system that is needed for MPF)
Note by cobra18t: The original author installed "serial". This does not work for me. I had to install "pyserial" with:
python2 -m pip install pyserial
The “rs232Intf” file can not be installed with pip so you need to go here to download a copy of the file: rs232Intf
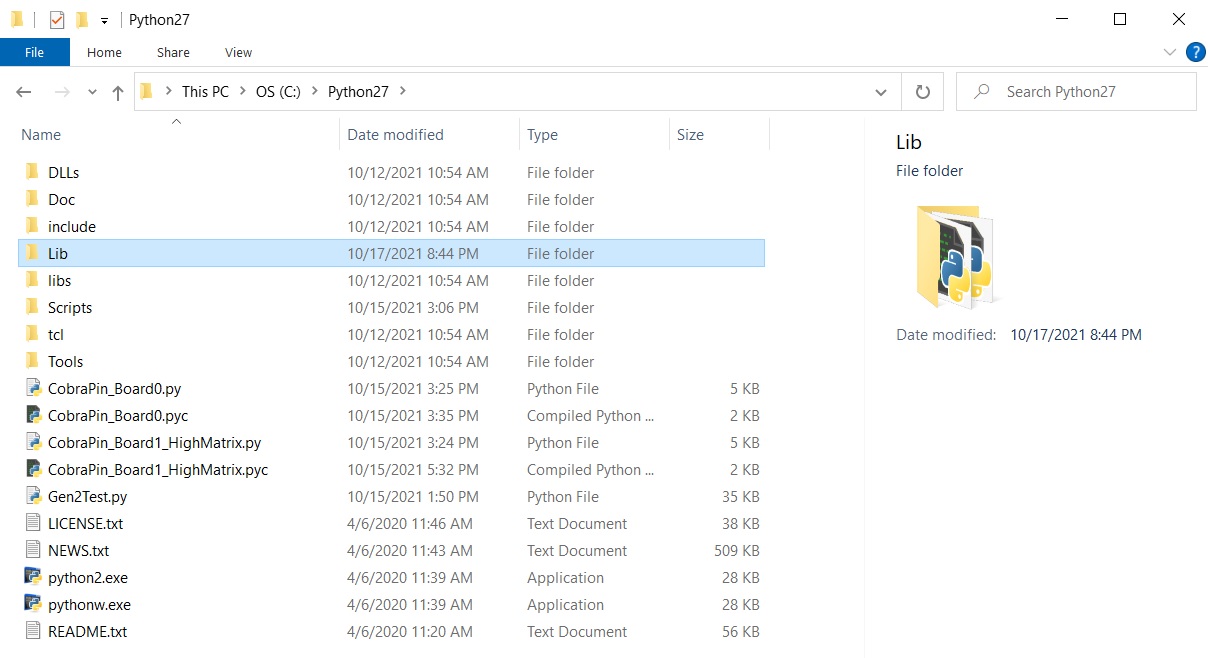
Once downloaded, place the file in your Lib folder in Python 2
Congrats! You are now ready to install the Cobrapin software for chains 0 and 1.
Go here: Cobrapin Files and download the appropriate versions of the Cobrapin software for your particular needs for both boards “0” and “1”. Place these files in your Python 2 folder
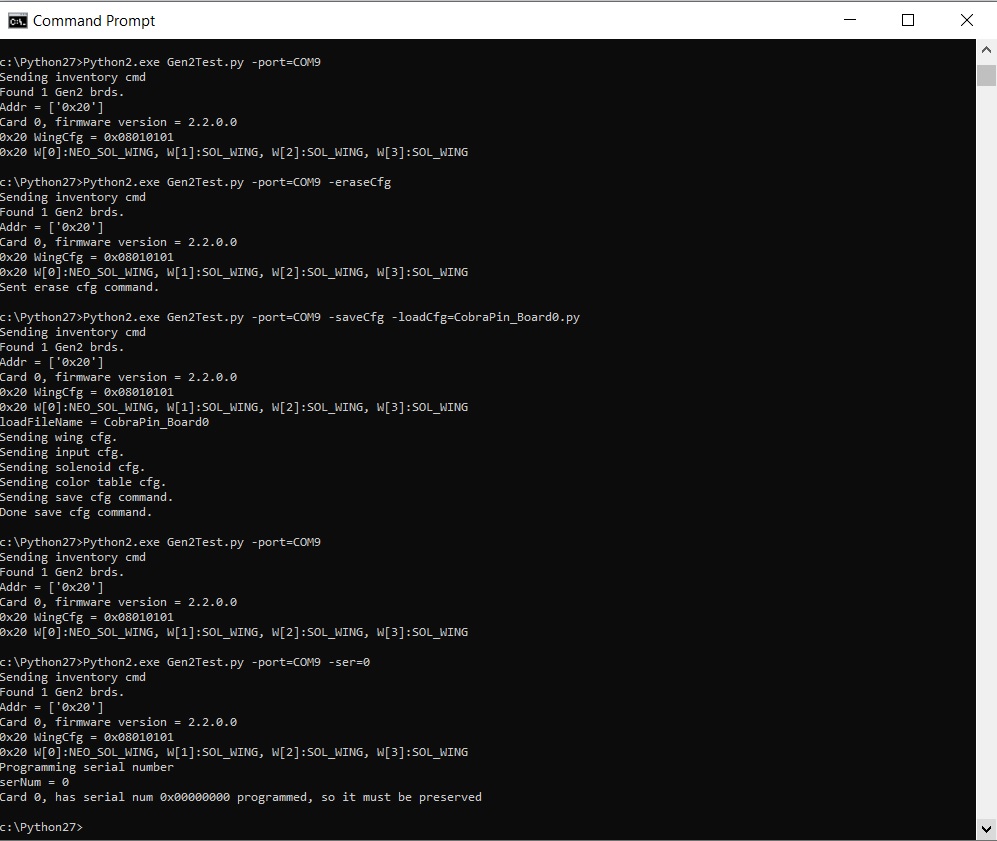
Lets start with board “0”. In command prompt (while still in the python 2 directory) enter “python2 .exe Gen2Test.py port=COMx” where “x” is the COM port number that you noted from Device manger. In my case it was COM9. Hit return and you should get a readout of the board firmware version along with the wings. The printout for this and the following steps should look like this.
After this enter these commands where “x” is your board’s Com port.
1) python2.exe Gen2Test.py -port=COMx –eraseCfg
2) python2.exe Gen2Test.py -port=COMx –saveCfg –loadCfg=CobraPin_Board0.py (make sure this matches the file name for your board “0” file)
3) python2.exe Gen2Test.py -port=COMx
4) python2.exe Gen2Test.py -port=COMx –ser=0
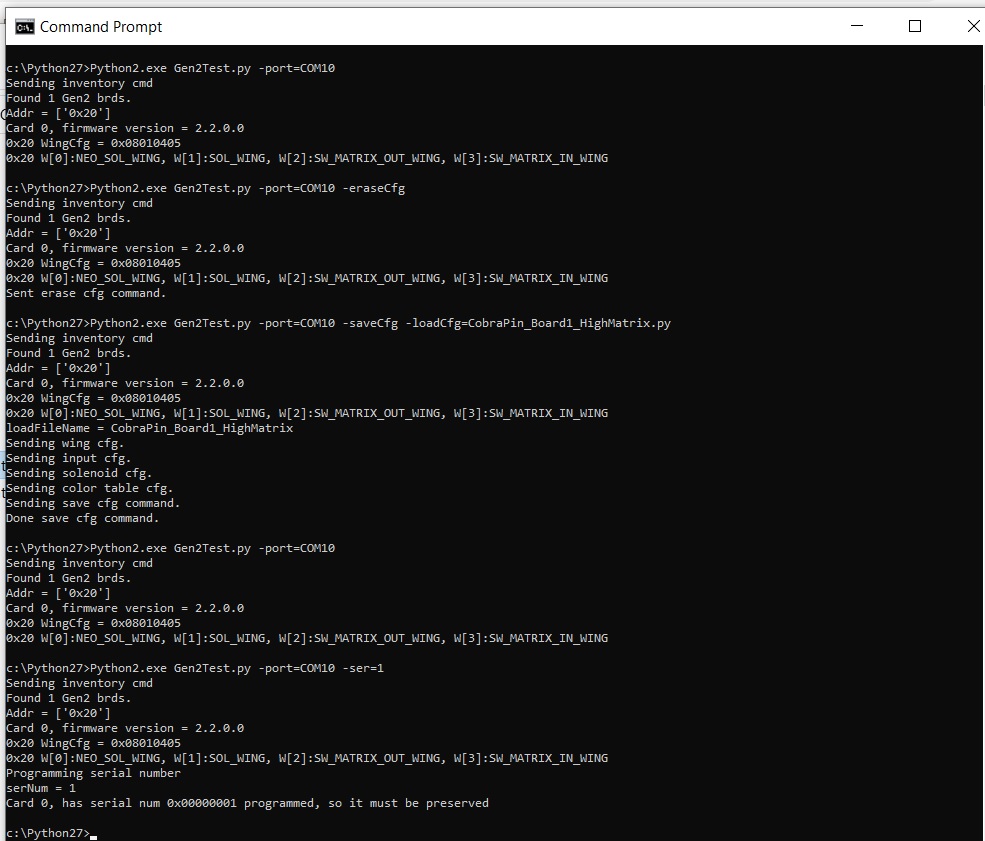
Wow you are done with board 0! Board 1 is exactly the same but use the file name for your board 1 file in step 2. Also set the serial number to 1 in step 4 by using “–ser=1”. The output should look like this.
Hooray you have just completed programming your STM-32’s!

